


If your AR 10 has ever misfired or jammed while you were shooting it at the range, it’s quite likely that you skipped one critical step. After using your AR-10 upper’s or any rifle, make sure you clean it completely. If you don’t, you’ll very surely get the misfiring or jamming stated before.
Any seasoned guns dealer will remind you that it is vital to first purchase your AR 10 to get a high-quality, well-stocked weapon full AR 10 rifle cleaner. If you don’t know how to clean your rifle AR-10 after you fired it, you’ll beg for trouble! There are many alternatives for cleaning guns, but if you choose one specifically built for your gun’s style, construction, or models, you will receive the greatest results.
To clean your AR 10 Preparation
The following stages start preparing for the clean-up of your AR 10 gun:
Create a clean and elegant bench or cleaning place. Configure your cleaning tools and supplies and your cleaning kit.
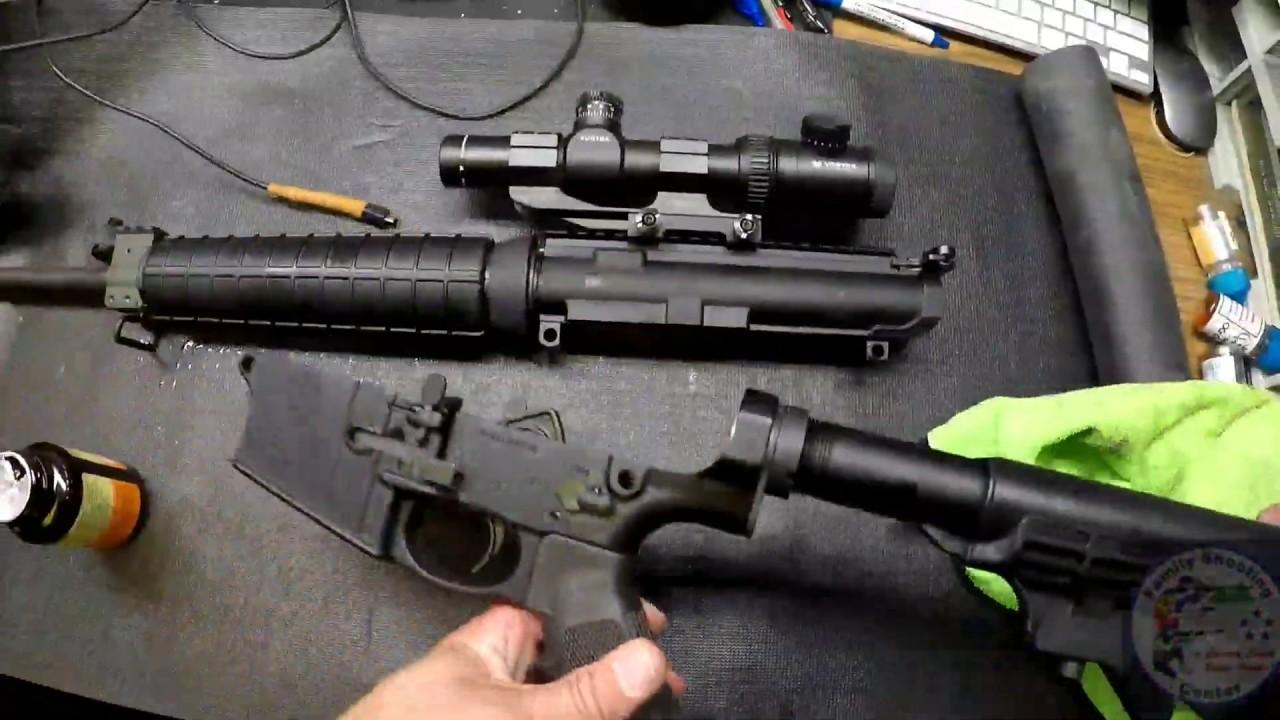
AR 10 Field Cleaning and Stripping Procedures
The following are the cleaning procedures:
- Make sure the magazine is removed, and there are no rounds in the chamber. Check the barrel to see if there is anything lodged in the breech or barrel.
- Turn the gun over by pressing in on the Takedown pin when the rifle is laying on its left side. Pull the pin outward, and the pivot pin’s lower portion will dropdown.
- Pull the charging handle all the way out to release the bolt carrier group, then remove and set it aside before pushing the charging handle the rest of the way out and laying it away.
Bolt carriers are disassembled and cleaned
- If you take the firing pin out, a specific tool can be used to hold the pin directly from the other side of the carrier.
- When you tap the boulder carrier on the bench, the Firing Pin drops outright. Then cut the bolt of the Carrier. Put the bolt together, turn it left, take the retaining pin off and pull out.
- Release the extractor from its bolt by punching the restraining pin and releasing the extractor that finishes the bolt carriers’ dismantling.
- Clean with a clean microfiber fabric all Bolt Carrier components. With a powerful gun cleaning solvent, all carbon accumulation on all the parts is removed. Use a good polymer cleaning brush to guarantee you clean all parts without damage.
Lubricating And Reassembling
- Apply the extractor with a generous amount of lubrication and reinstall it. Due to the pressure from the spring, pinch the extractor a little and force the retention pin into position. Ensure lubrication of the firing pin and holding pin. Lubricate the whole outside of the Bolt Carrier Assembly.
- Substitute the carrier for the bolt, ensuring that the extract faces to and outside. Set the pin back to a locked position and rotate it.
- Drop the pin into the interior of the Carrier fire pin retainer install. The firing Handle will return to its original place in the top of the weapon.
- Place the Bolt Carrier above the Fluke Handle within. Remember and secure the original location of the Bolt Carrier and Charging Handle in the upper part.
- Put together the top and bottom portions and replace pins, and fill up your gun. Drag and drop the charge handle numerous times to make sure everything moves properly.
So, this was all about keeping your rifle clean and stripping the field. Make sure to read this before you handle the rifle safely.
More Stories
News Aggregators: Problems and Solutions
Why You Need to Keep Apprised of Local Business News
How to Determine the Profitability of a Franchise Opportunity